|
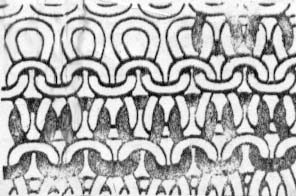
Selvedge
*Cast on in waste yarn with all 72 cylinder needles in the
cylinder.
*Put your ribber on and knit a few rows to make sure that it is in
position and the lug on the dial is hitting the pin inside the cylinder.
*Switch every other cylinder needle to a ribber needle, so you will
have a 1 cylinder needle, 1 ribber needle pattern all the way
around.
*Knit a few rows in waste yarn, then tie on your sock yarn with a
Granny Knot.
*Knit one row.
*Put ribber dial in 'out' position and knit two rows.
*Put ribber back into the 'in' position and knit 50 rows.
End of Selvedge
*Switch rib needles back to cylinder needles so they are all back in
the cylinder. You can now remove the ribber and place it in it's
holder. (You may need to lift the ribber out with a screwdriver by placing
it underneath the ribber arm and prying it upwards, if it's on tight.)
*Make sure all the needle latches are open and knit 10 rows plain
stockinette, ending with the yarn carrier in the front of the machine.
Heel
*Raise up out of action all the needles behind the hash mark except for
the first two on each side. You will have 32 total needles raised up on
the back side of your cylinder.
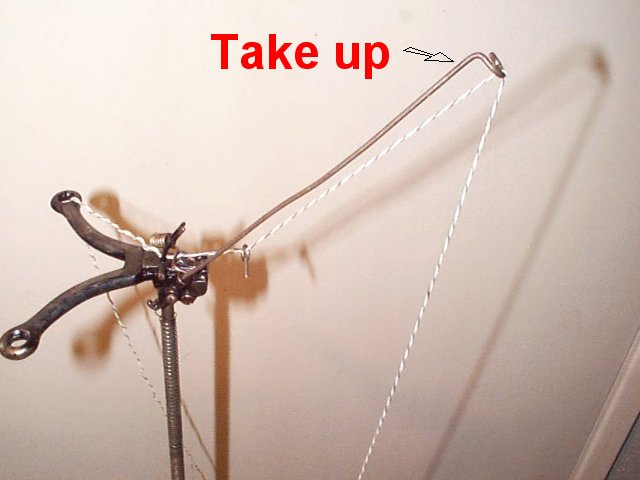
*Place your yarn in the "take up".

*Knit all the way towards the back so your yarn carrier is in the back
of the machine. Raise two needles up out of action on the right side
of the machine.
*Knit to the other side and raise two needles up out of action on the
left side of the machine.
*Knit to the right and raise 1 needle up out of action on the right
side of the machine.
*Knit to the left and raise 1 needle up out of action on the left side
of the machine. (You will always be raising and lowering the needles
on the same side your yarn is.)
You will eventually need to start pulling down on the front of the sock
while you are doing this, and/or add a heel fork weight or other weight to
the front of the sock.
*Continue this way, back and forth, one needle at a time, until
you've decreased down to 14 needles left working in the front of
your machine. (you should have red marks or hash marks on the front of
your cylinder showing you where to stop decreasing)
*End with the machine on the right side.
If you haven't done so already, add a heel fork or other weight to the
front of the sock in the pocket of the heel. Raise the weight up as
needed.
*Now lower two needles on the right side of the machine and knit to the
left.
*Lower two needles on the left side and knit to the right.
*Lower 1 needle on the right side and knit to the left.
*Continue lowering the needles one at a time until the needles you
started raising, are all back down, except for the last one on the right
hand side.
*Stop with your yarn carrier in the front of the machine and lower all
the upraised needles in the back, down. ( Make sure that all the latches
are open before you start to knit.)
*Take yarn out of "take up".
End of Heel
*Knit 75 rows for the foot. End with yarn carrier in
the front of the machine.
Toe
*Raise the back half needles up out of action. This would be
all the needles behind the hash/red mark on the cylinder. Put yarn in
"take up".
*Knit the toe just like the heel, decreasing &
increasing; end with yarn carrier in front of the machine.
*Lower back needles, making sure all latches are open.
*Knit to right side, just until the needle right before the
hash mark has knit the stitch.
*Break yarn above, leaving a long tail. Tie on your
waste yarn with a granny knot.
*Take your work hook and pull the yarn through the front of
the yarn carrier until you've reached the waste yarn. Now knit a few rows
with waste yarn.
Now you can knit another sock!
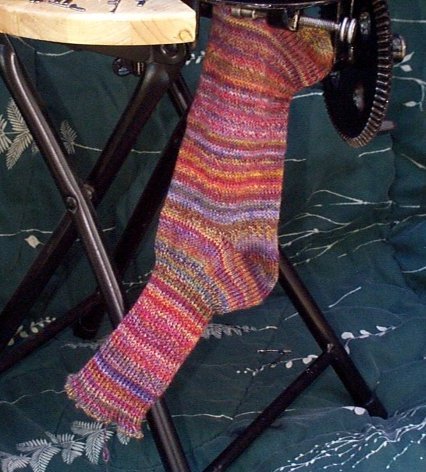
Taking the sock off the tube
Once you have a long enough tube (I usually knit 2 to
3 socks before I start taking them off the machine) you can cut the waste
yarn above the rib and pull it out. This will give you a closed edge
on the top of the sock rib.
Kitchener's Stitch
You now need to close the toe.
*Turn the sock inside out.
*Undo the granny knot (leaving the waste yarn on) and thread
the toe part of the sock yarn onto a needle.
*Put the needle through the first stitch on the left side
and bring the yarn to the outside of the sock.
*Turn sock right side out. Fold over waste yarn and
weave the two sides together with kitchener's stitch..

*Weave yarn into addition stitches at the end to lock and
cut tail.
|